Have you ever dreamed of restoring the warm, natural beauty of your hardwood floors but recoiled at the thought of hiring a professional? You’re not alone! Refinishing hardwood floors can seem like a daunting task, but with the right approach, it can be a rewarding and achievable DIY project. This guide will empower you with the knowledge and steps you need to transform your floors from dull and worn to gleaming and magnificent.

Image: howtobuildit.org
Refinishing hardwood floors is a process that involves sanding down the existing finish, repairing any imperfections, and applying a new coat of stain and sealant. It’s a transformative process that can breathe new life into your home, enhancing its value and aesthetic appeal. However, it’s important to note that refinishing hardwood floors is not a walk in the park. It requires patience, time, and a commitment to following proper procedures. Let’s dive into the details and see if it’s a project you can tackle with confidence.
Assessing Your Floor’s Condition: The Foundation of a Successful Refinishing Project
Before embarking on this DIY adventure, a thorough assessment of your hardwood floors is crucial. This step will help you determine if refinishing is the right solution and guide your decision-making process.
- Identify the Type of Wood: Knowing the type of hardwood you have is important. Different hardwoods require specific sanding techniques and finishes. While some woods, like oak, are more durable and easier to refinish, others, like pine, might be more delicate. Researching your wood type before you start is essential.
- Evaluate the Existing Finish: Determining the existing finish (polyurethane, varnish, oil-based, etc.) is important to understand how the sanding process will be affected. Some finishes are more difficult to remove than others.
- Inspect for Damage: Look for signs of damage, such as scratches, dents, water damage, or gaps between boards. Determine if these can be effectively repaired with sanding and filler.
- Consider the Floor’s Age: Older floors might have old finishes that are difficult to remove. Consult with a professional if you’re unsure about the age or history of your floors, especially if you suspect they’ve been refinished multiple times.
The Essentials: Tools and Materials for Your Refinishing Project

Image: viewfloor.co
Equipping yourself with the right tools and materials is essential for a smooth and successful refinishing process. Consider the following:
- Sanding Machine: Rent a drum sander (large surface areas) and edge sander (edges and corners). You may also need a hand sander for detailing.
- Sandpaper: Use a progressive grit system (e.g., 40, 80, 100, 120) to smooth the surface. Choose the right grit for your project and floor’s condition.
- Wood Filler: For filling gaps and scratches, use a wood filler that matches your hardwood color.
- Tack Cloth: For removing dust and debris before staining and sealing.
- Staining Supplies: Choose a stain that complements your home’s decor. Consider both the color and the finish, such as oil or water-based, and ensure you have staining brushes and rags.
- Sealant Supplies: Polyurethane is a common sealant, available in different finishes (gloss, semi-gloss, satin, matte) and application methods (spray, brush, roller). Choose the finish that aligns with your desired look and floor’s traffic levels.
- Safety Gear: Dust masks, gloves, eye protection, and ear protection are essential for safety during sanding and finishing.
Step-by-Step Guide: Refinishing Your Hardwood Floors Like a Pro
Once you have assessed your floors and gathered the necessary tools and materials, it’s time to dive into the refinishing process. The following steps will guide you through each stage:
- Preparation: Before you start sanding, move all furniture, rugs, and other items out of the room. If necessary, cover walls and baseboards with drop cloths to prevent dust damage. Also, make sure the room is well-ventilated.
- Sanding: Sanding is the most labor-intensive part of the process. Start with a coarse grit sandpaper (e.g., 40) and work your way down to finer grits (e.g., 120). Remember to use consistent movements and overlap each pass to avoid uneven sanding. Pay close attention to edges and corners.
- Wood Filler (if needed): After sanding, use wood filler to fill any gaps and scratches. Let it dry completely before sanding again with fine grit sandpaper.
- Vacuum and Tack Cloth: Thoroughly vacuum the floor to remove dust and debris, then wipe it down with a tack cloth to pick up remaining particles.
- Staining (optional): If you’re applying stain, follow the manufacturer’s instructions for proper application. Use a brush or rag to evenly apply stain to the floor. Let it dry, and apply the second coat accordingly.
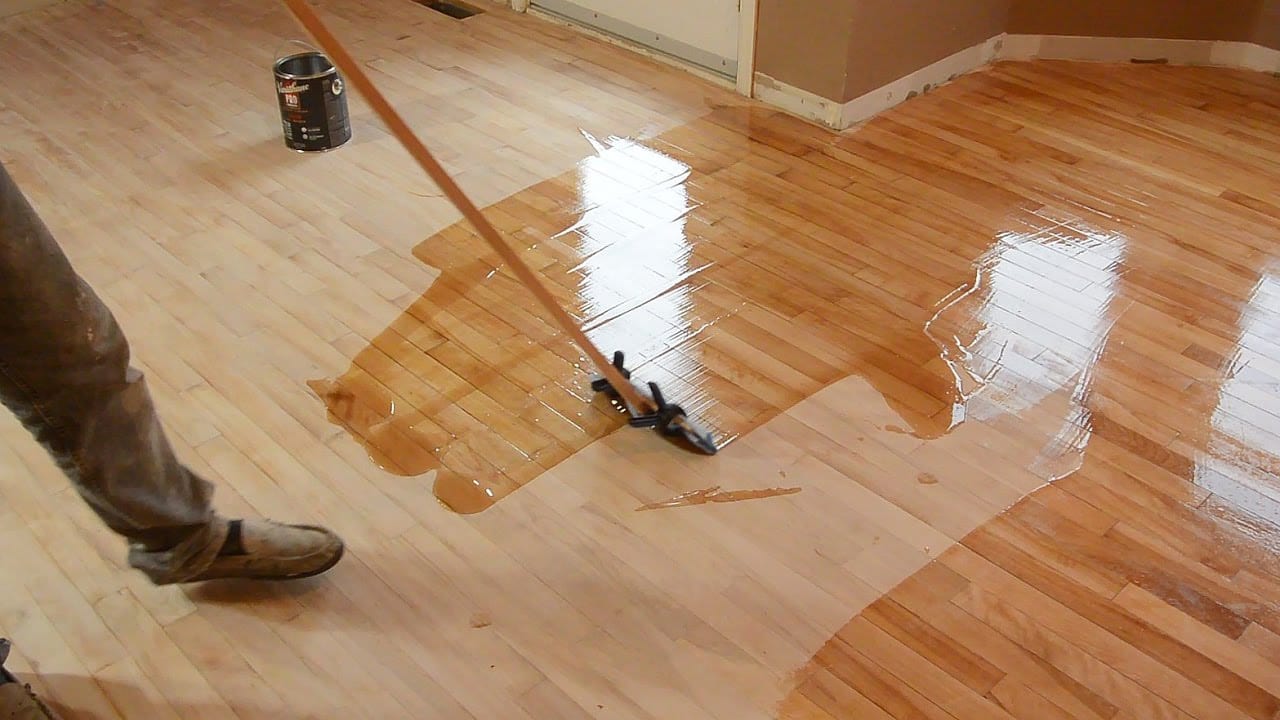
- Sealing: Apply polyurethane sealant in thin coats, ensuring each coat dries completely before applying the next. Use a brush, roller, or sprayer depending on the chosen method. Two to three coats are usually recommended.
- Clean Up: After the sealant dries, clean up any spills or splatters. You can now enjoy your beautifully refinished floors.
Troubleshooting Common Refinishing Challenges
Even with meticulous preparation and careful execution, you might encounter some unexpected challenges during the refinishing process. Here are a few common issues and tips to address them:
- Uneven Sanding: If your floor looks uneven after sanding, you may have applied too much pressure in some areas. Resand the uneven areas with a finer grit sandpaper to smooth out the surface.
- Dust and Debris: Dust and debris can affect the finish. Thoroughly vacuum and wipe down the floor with a tack cloth to prevent flaws in the final finish.
- Uneven Stain Application: If the stain is uneven, wipe it down immediately with a damp rag to remove excess stain and achieve a more uniform appearance.
- Polyurethane Bubbles: Bubbles can occur if the polyurethane is applied too thick or if the floor was not sufficiently dry. Sand down the bubbles with fine-grit sandpaper and apply a new coat of sealant.
Safety First: Tips for Safe Refinishing
Refinishing hardwood floors involves working with power tools and chemicals, so safety is paramount. Here are some essential safety tips:
- Dust Masks and Eye Protection: Wear a respirator to protect yourself from dust inhalations, and always use eye protection to prevent debris from entering your eyes.
- Gloves: Wear gloves to protect your hands from chemicals, especially when working with stain and sealant.
- Ventilation: Ensure proper air circulation by opening windows and doors during sanding and applying sealant. Use fans to help remove dust and fumes.
- Fire Safety: Keep a fire extinguisher handy when working with sanding dust, which can be flammable.
- Read Instructions: Always carefully read and follow the manufacturer’s instructions for all tools, sanding materials, stain, and sealant.
When to Seek Professional Help: Recognizing When It Might Be Best to Leave It to the Experts
Though refinishing hardwood floors can be a rewarding DIY project, there are situations where seeking professional help can save you time, frustration, and potential damage. Here are some instances when it’s wise to call in the pros:
- Extensive Damage: If your floors have significant damage, such as water damage, structural issues, or extensive warping, it may not be feasible to refinish them DIY. A professional can assess the damage and recommend a suitable repair solution.
- Unique or Rare Floor: For floors made of rare or valuable wood, a professional who has experience working with these materials can ensure proper care and handling.
- Large Areas: If you’re tackling a large area or have multiple rooms, the project can be very time-consuming. Hiring professionals might be more efficient and less physically demanding.
- Limited Experience: If you have no prior experience with sanding, staining, or sealing, seeking professional help can provide peace of mind and a higher chance of achieving desired results.
Can You Refinish Your Own Hardwood Floors
The Reward: Your Stunning Hardwood Floors!
Refinishing hardwood floors is a journey that requires dedication, patience, and a touch of grit. However, the end result—stunning, revitalized floors that bring warmth and elegance to your home—is truly rewarding. By following this guide, you can equip yourself with the necessary knowledge and confidence to tackle this DIY project. You can transform your floors from mundane to magnificent! So, roll up your sleeves, gather your tools, and embark on the journey to restoring the timeless beauty of your hardwood floors.


