You’ve just finished laying your beautiful new vinyl flooring, but now you’re staring at that awkward corner around your toilet or the strange shape your fireplace throws into the room. The thought of cutting the flooring to fit those pesky objects makes your heart sink, doesn’t it? Don’t worry, it’s not a lost cause! You can achieve a professional look with some simple tools and a few carefully measured cuts.

Image: www.flooringsuppliesdirect.co.uk
This article will walk you through how to cut vinyl flooring around objects with a few essential tips and tricks. By the end, you’ll be a pro at maneuvering your flooring around those tricky corners and curves – and your room will thank you for it!
Choosing the Right Tools
First, let’s gather our tools.
-
A Sharp Utility Knife: This is your primary weapon in this battle against those pesky objects. A sharp utility knife provides clean, precise cuts and prevents the vinyl from tearing or fraying. And don’t forget those extra blades for those tough corners.
-
A Measuring Tape: You can’t cut precisely without knowing exactly what you’re dealing with. A measuring tape will be your best friend for getting those measurements just right.
-
A Pencil: To make sure your cuts are accurate, you’ll need to mark the vinyl flooring where you plan to cut. A pencil will help you do this with precision.
-
A Straight Edge (Optional): This is not strictly required, but a straight edge can be very beneficial. It gives you a precise line for your cuts, especially around sharp angles. It can be something as simple as a ruler or a strip of wood.
-
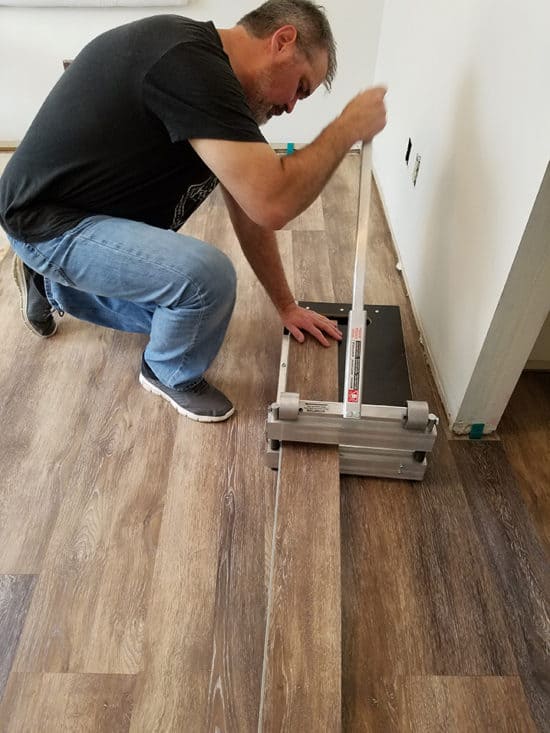
A Flooring Cutting Tool (Optional): This is a dedicated tool for cutting vinyl and other flooring materials. While not necessary, it can make the cutting process significantly easier and give you more precise cuts.
Preparation Makes Perfect
Before you start wielding your utility knife, there are a few steps you should take to set yourself up for success.
-
Clean the Area: Dust, dirt, and debris can interfere with your cuts and even scratch your newly laid flooring! Give the area a good wipe down with a damp cloth before you start measuring.
-
Plan Your Cuts: Take a few minutes to visualize your room and your cuts. Decide whether it’s better to cut around the object or trim it down to fit.
-
Prepare Your Vinyl: You’ll want the vinyl flooring to be able to move freely. If you’ve already laid it down, carefully lift up the section that needs to be cut. If you’re laying it fresh, just make sure it’s laid flat and unfurled.
Getting Started: Measuring and Marking
Time to get those measurements!
-
Measure and Mark: With your trusty measuring tape in hand, determine the exact dimensions of your object and where you plan to cut the vinyl. Don’t forget to factor in any trim or baseboard! Mark your cut lines with your pencil.
-
Use a Straight Edge (Optional): If you are using a straight edge, place it carefully along your marked line. This will guide your knife for a clean and precise cut.

Image: ar.inspiredpencil.com
The Big Cut
You’re ready to cut! Remember, it’s better to make small, controlled cuts than one big, messy slash.
-
Score the Vinyl: Gently place your utility knife along your pencil line. Gently press down and score the surface of the vinyl. This will create a clear incision that guides the rest of your cut.
-
Cut Through the Vinyl: Now, move your utility knife along the score line with a little more pressure. Continue cutting in a steady motion.
-
Be Patient: This is not a race. Take your time, ensure your cuts are clean, and don’t rush.
-
Clean the Edge: It’s a good idea to go over your cut line again with the knife. This helps create a smooth and consistent edge for your flooring.
Handling those Tricky Corners
Now let’s face those challenging corners head-on! This is where it’s helpful to have that straight edge as your knight in shining armor.
-
Cut and Trim: Follow the same cutting techniques as before, but make sure to make multiple cuts. You can cut a small portion at a time, trimming as you go along.
-
Use the Straight Edge: A straight edge really comes in handy for those tight corners. It helps you create smooth lines, perfect for achieving a clean and polished look.
-
Patience is Key: It might take a few attempts to get it perfect, so don’t get disheartened if the first few cuts aren’t exactly how you pictured.
Essential Tips for Success
-
Safety First: Always cut in a well-ventilated area. Wearing gloves can protect your hands.
-
Test Your Cuts: If you’re unsure about your measurements, practice on a scrap piece of vinyl before cutting your final piece.
-
Check for Gaps: Once you’ve cut the vinyl, make sure it fits smoothly around the object. If there are any gaps, you might need to adjust your cuts.
-
Get Professional Help: If you’re not comfortable making the cuts yourself, don’t hesitate to call in a professional. They can ensure the work is done correctly and safely.
How To Cut Vinyl Flooring Around Objects
Wrapping it Up
There you have it! Cutting vinyl flooring around objects may seem daunting at first, but with the right tools and techniques, you can achieve a professional and flawless installation. Be patient, take your time, and remember, practice makes perfect.
Now, go out there, embrace those challenges, and enjoy your beautiful new flooring!


