
Imagine stepping into your bathroom, ready to start your day, only to find you’re greeted by a leaky, dilapidated shower pan. It’s a frustrating and potentially costly problem, but one that can be tackled head-on. Building a shower pan on a wood floor might seem daunting, but with the right knowledge and a dedicated DIY spirit, you can create a luxurious, leak-proof oasis within your home. This comprehensive guide will walk you through the process, providing step-by-step instructions and valuable tips to ensure a successful and satisfying project.

Image: cabindiy.com
For homeowners with wood floors, building a shower pan can be a rewarding DIY project. It allows you to customize your bathroom, add value to your home, and create a spa-like experience without the hefty price tag of professional installation. Understanding the process, however, is crucial. This guide dives into the essential steps, materials, and techniques needed to ensure a sturdy, watertight shower pan, transforming your bathroom from tired to terrific.
Laying the Foundation: Preparation is Key
Before you start, you need to prepare the foundation. This involves:
-
Assessing the Existing Floor: Evaluate the structural integrity of your subfloor to ensure it can handle the weight of a shower pan and the water it will hold. You might need to reinforce the subfloor with additional joists if it’s in poor condition.
-
Creating a Level Surface: The shower pan needs to be level for proper drainage and to prevent water from pooling. Use a level to check the existing floor and use shims to adjust the height as needed.
Choosing the Right Materials: A Foundation for Success
The materials you use for your shower pan will directly impact its durability, water tightness, and overall performance:
-
Waterproof Membrane: The waterproof membrane is a crucial element that prevents water from leaking through the pan and into the subfloor. It’s the first layer of defense against leaks. Options include a variety of materials, including rubberized asphalt, PVC, and epoxy-based membranes.
-
Mortar Bed: The mortar bed helps to form the shape of the shower pan and provides a solid foundation for the tile. It’s a mixture of cement, sand, and water, and its thickness depends on the project’s needs.
-
Shower Pan Liner: The shower pan liner is a flexible, pre-molded piece that helps to contain water and ensure proper drainage. It’s typically made of PVC or acrylic and comes in various sizes and shapes to fit different shower configurations.
-
Tile and Grout: The tiles and grout you choose will directly impact the look and functionality of your shower pan. Consider factors like water resistance, durability, and aesthetics.
Building the Shower Pan: A Step-by-Step Guide
Now, let’s get into the heart of the process. Building a shower pan on a wood floor is a methodical process that involves these steps:
1. Framing the Shower Pan:
- Install Shower Pan Framing: Create a sturdy frame around the perimeter of the shower area. This framework will serve as a guide for pouring the mortar bed and will help to contain the water within the shower pan.
2. Waterproof Membrane Installation:
- Prepare the Subfloor: Once the framework is in place, ensure the subfloor within the shower is clean and free of debris.
- Install the Membrane: Lay down the waterproof membrane, ensuring it covers the entire surface of the shower pan. Overlapping the seams securely is crucial for a reliable water barrier.
3. Pouring the Mortar Bed:
- Prepare the Mortar: Mix the mortar according to the manufacturer’s instructions. Ensure consistency to allow for easy application and shaping.
- Apply the Mortar: Start pouring the mortar in the center of the shower pan and work your way outwards, using a trowel to create a smooth, even slope towards the drain.
- Level and Smooth: Use a level to ensure the mortar bed is consistently sloped towards the drain. Smooth the surface and create a finished look.
- Create Drain Opening: Cut an opening in the center of the mortar bed to accommodate the drainpipe.
- Install Drain: Position and secure the drainpipe in the mortar bed. Ensure its flush with the surface of the mortar bed.
4. Setting the Shower Pan Liner:
- Laying the Liner: Once the mortar bed is completely dry, install the shower pan liner. Ensure it extends beyond the edges of the mortar bed for a secure seal.
- Securing the Liner: Use tape and sealant to secure the shower pan liner to the mortar bed. Make sure to create a tight, waterproof bond.
5. Installing Tile:
- Prepping the Surface: Prepare the surface of the shower pan liner for tile installation by cleaning it thoroughly and ensuring it’s free from debris.
- Tile Application: Lay tiles on the prepared surface, following the specific spacing required. Use thinset mortar to adhere the tiles.
- Grouting: Once the thinset mortar is dry, grout between the tiles, filling any gaps and creating a smooth, seamless finish.
6. Finishing Touches:
- Cleaning and Protecting: After grouting is complete, clean the shower and let the grout cure thoroughly. Apply sealant over the grout to protect it and prevent discoloration, enhancing its longevity.
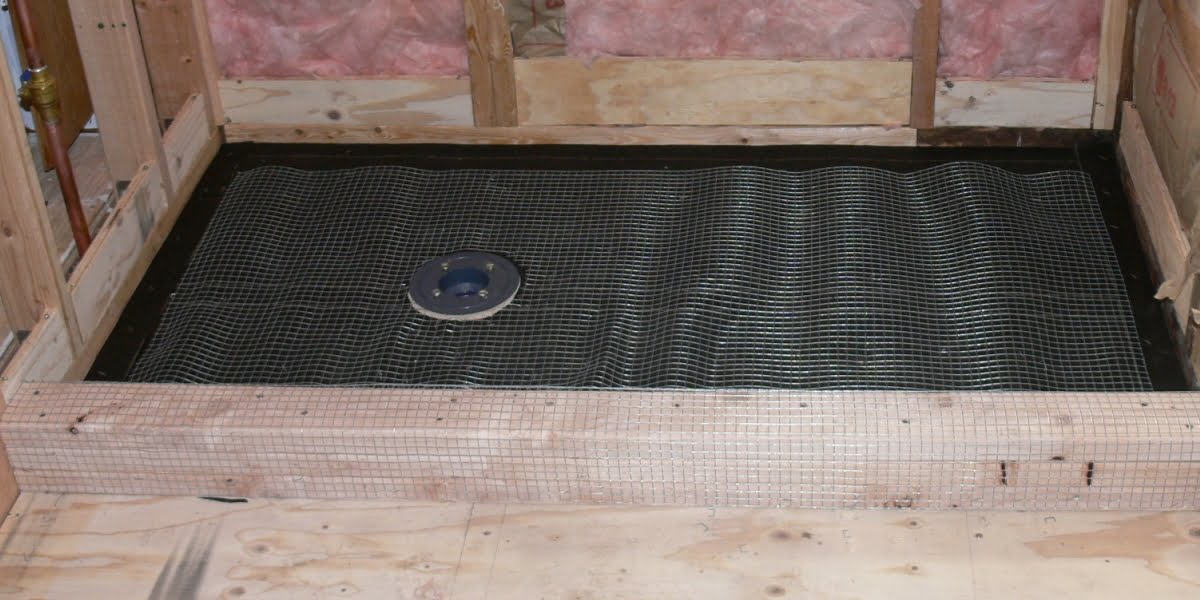
Image: www.reviewhome.co
Expert Insights: Building a Better Shower Pan
Building a durable, leak-proof shower pan takes experience and attention to detail. Here are some crucial tips from professionals:
- Invest in Quality Materials: Don’t skimp on materials. Using high-quality waterproof membrane, mortar, and tile will save you headaches and ensure a lasting, beautiful shower pan.
- Precise Measurements: Accurate measurements are crucial for a correctly sized shower pan and a perfect fit for the drain.
- Adequate Slope: The shower pan needs a consistent slope towards the drain. This will ensure proper water drainage and prevent pooling. The recommended slope is typically 1/4 inch per foot.
How To Build A Shower Pan On Wood Floor
A Shower Pan That Exceeds Expectations
Building a shower pan on a wood floor is a challenging but rewarding DIY project. By following these steps, understanding the materials, and incorporating expert advice, you can create a watertight, sustainable shower pan that elevates your bathroom to a whole new level of luxury. With careful planning and a passion for DIY, you can transform your bathroom into a spa-like sanctuary, one luxurious shower at a time.


