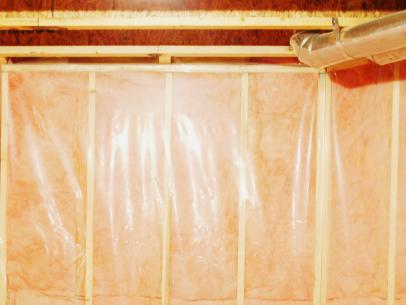
You’ve chosen vinyl plank flooring for its durability, style, and ease of maintenance, but have you considered the importance of a vapor barrier? It’s a critical step often overlooked, but it can protect your investment and prevent costly problems down the line. This guide will delve into the reasons why a vapor barrier is essential, the different types available, and provide a step-by-step installation process.

Image: www.pinterest.com
Imagine this: you’ve just finished installing your beautiful new vinyl plank flooring, but a few months later, you notice warping, buckling, or even mold growth. The culprit? Excess moisture trapped beneath the flooring. A properly installed vapor barrier acts as a shield against moisture from below, safeguarding your flooring and creating a healthy, comfortable living space.
Why is a Vapor Barrier Important?
A vapor barrier is crucial for preventing moisture damage to your vinyl plank flooring by acting as a barrier to water vapor. Here’s why it’s essential:
Moisture Control
Moisture from the ground, crawlspace, or even spills can seep up and penetrate the flooring. A vapor barrier prevents this moisture from reaching the subfloor and damaging the vinyl planks.
Mold and Mildew Prevention
A damp subfloor is a breeding ground for mold and mildew, which can compromise the structural integrity of your home and pose health risks. A vapor barrier helps maintain a dry environment, inhibiting the growth of these harmful organisms.

Image: jjvs.org
Floor Stability
Excessive moisture can cause the subfloor to warp or buckle, leading to uneven flooring and potential tripping hazards. A vapor barrier ensures the subfloor stays dry and stable, preventing these problems.
Protecting Your Investment
Installing a vapor barrier is a small investment that can save you from much larger costs in the future. By preventing moisture damage, you extend the life of your flooring and protect your overall investment.
Types of Vapor Barriers
Various materials can be used as vapor barriers, each with its own advantages and disadvantages. Here’s a closer look at some common options:
Polyethylene Sheeting
Polyethylene sheeting is a popular choice due to its affordability and ease of installation. It’s available in various thicknesses, with thicker sheets offering better moisture resistance. However, it can be susceptible to punctures and tearing.
6-Mil Polyethylene Sheeting
This type of sheeting is commonly used for vapor barriers. It’s a strong, durable material that offers excellent moisture protection. Its thickness provides a reliable barrier against moisture, even from high-humidity environments.
HDPE Sheeting
High-density polyethylene (HDPE) sheeting is a more robust option, offering greater durability and tear resistance. It’s ideal for areas with heavy foot traffic or where the risk of punctures is higher.
Moisture Barrier Underlayment
Some manufacturers offer specialized underlayment with built-in moisture barriers. These products combine the benefits of a vapor barrier with the cushioning and sound-dampening properties of underlayment, offering a one-step solution.
How to Install a Vapor Barrier
Installing a vapor barrier is a relatively straightforward process, but it’s essential to follow the correct steps to ensure its effectiveness. Here’s a comprehensive guide:
Step 1: Prepare the Subfloor
Before laying down the vapor barrier, ensure that the subfloor is clean, dry, and level. Remove any debris, dirt, or existing flooring materials.
Step 2: Measure and Cut
Measure the area where you’ll be installing the vapor barrier and cut the sheeting to size, leaving a few inches of overlap between sheets. Use a utility knife or shears for precise cutting.
Step 3: Lay Down the Vapor Barrier
Unroll the sheeting, starting in one corner of the room. Overlap the sheets by at least 6 inches and use tape to seal the seams. Ensure the vapor barrier completely covers the entire subfloor area.
Step 4: Secure the Vapor Barrier
Use staples or a vapor barrier tape to secure the sheeting to the subfloor. Staple the sheeting along the edges and along the seams to ensure it remains in place. If using tape, apply it along the overlaps and seams to create a waterproof seal.
Step 5: Install Your Flooring
Once the vapor barrier is installed, you can proceed with installing your vinyl plank flooring according to the manufacturer’s instructions.
Additional Tips
Here are some additional tips to ensure a successful vapor barrier installation:
- Check the manufacturer’s recommendations: Consult the instructions for your specific vinyl plank flooring and vapor barrier materials. They may have specific recommendations for installation and overlapping.
- Use the correct tape: For sealing seams, use vapor barrier tape designed specifically for this purpose. These tapes are highly adhesive and waterproof, ensuring a reliable seal.
- Don’t forget the edges: Run the vapor barrier up the walls for at least 2 to 3 inches to prevent moisture from seeping in from the sides.
- Inspect periodically: Even with a properly installed vapor barrier, it’s essential to regularly inspect the flooring for any signs of moisture damage. Early detection can prevent major problems.
How To Install Vapor Barrier Under Vinyl Plank Flooring
Conclusion
Installing a vapor barrier is a crucial step in protecting your vinyl plank flooring from moisture damage. It’s a small but essential investment that can save you significant expenses and headaches in the future. By following this comprehensive guide, you can install a vapor barrier effectively and ensure your new flooring remains beautiful and functional for years to come. Remember, a dry subfloor is a happy subfloor!


